# Setting Up Widgets
### The Project
In this project, we will create a Weather Widget that can show up to 6 six different weather conditions. The conditions will change based on a location you input into the widget. Additionally, this widget will scale to look great in a small, medium, and large variant. As well, it will adapt to be viewable as a lock screen widget and standby widget on iOS. It will also be available on iPadOS and macOS. We will also use App Intents to allow this widget to be configurable and let the user input a location and have the weather and widget display update.
### Creating a Widget Extension
1. Create a new app. While you can use either SwiftUI or UIKit for your app, your Widget can only be built in SwiftUI.
2. Our Widget will live in a Widget Extension. Create a new Widget by selecting **File → New → Target → Multiplatform → Widget Extension.**
3. You can specify the platforms you want this widget to be available on. We want this widget to work on all platforms available, so we will select **Multiplatform.**
4. Uncheck “Include Configuration App Intent”
### Project Navigator
A new directory will be generated inside of your project navigator:
* `WeatherWidgetBundle.swift` is the main entry-point for our widget. If we have multiple widgets for our app, we can declare them here within a `WidgetBundle`.
* `WeatherWidget.swift` contains the majority of code that defines the Widget. It contains four components, the widget extension’s `TimelineProvider`, its `TimelineEntry`, its `View`, and the `Widget` itself.
* `Assets.xcassets` is a catalog that contains the widget’s images, icons, colors, and more. This is separate from your app’s own xcassets catalog.
* `Info.plist` is a list of metadata relevant for our widget. It can contain appearance options and various other settings.
* `WeatherWidget.entitlements` is a list of special capabilities this widget requires. It contains key-value pairs that grant an executable permission to use a service.
### Canvas and Live Previews
On the right side of Xcode, you should see a canvas containing a preview of the app. If not, go to the **Editor** menu and select **Canvas** (alternatively ⌥ ⌘ ↵). The device that is shown on the preview depends on the device you select at the top center of Xcode. Because the preview is updated live, errors within your code can cause the preview to pause. To resume, you can click **Resume** in the canvas or even better, use the shortcut: ⌥ ⌘ P
The canvas shows the default widget generated by Xcode on the home screen. Beneath, you can see a visualization of the timeline for this widget. We will discuss the Widget’s timeline in more depth shortly. Feel free to play around with the Widget’s `View` inside of `WeatherWidget.swift` and see how the live preview responds!
### Project Setup
While it is nice to have this boilerplate code generated for us, we want to start things off from scratch to better understand how Widgets are built.
1. Delete all of the code inside of `WeatherWidget.swift`. Eventually, this file will contain the widget and its configuration.
2. Create 4 new Swift files:
1. `Weather.swift`: This file will contain the Weather model to hold our data.
2. `WeatherWidgetEntry.swift`: This file will contain the definition for an entry of our widget.
3. `WeatherWidgetProvider.swift`: This file will contain the Widget’s timeline provider.
4. `WeatherWidgetView.swift`: This file will contain the SwiftUI view for our widget.
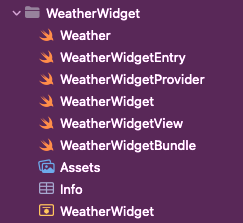
3. In the next section, we will start writing these files and building our widget. For now, ensure your project navigator looks as such:
---
# Agent Instructions: Querying This Documentation
If you need additional information that is not directly available in this page, you can query the documentation dynamically by asking a question.
Perform an HTTP GET request on the current page URL with the `ask` query parameter:
```
GET https://ios-course.cornellappdev.com/resources/archived-past-semesters/fa23/lectures/widgets/setting-up-widgets.md?ask=
```
The question should be specific, self-contained, and written in natural language.
The response will contain a direct answer to the question and relevant excerpts and sources from the documentation.
Use this mechanism when the answer is not explicitly present in the current page, you need clarification or additional context, or you want to retrieve related documentation sections.